
Check the Aquagate sensor and make sure is dry
Check the batteries and replace if necessary.
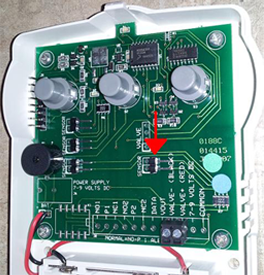
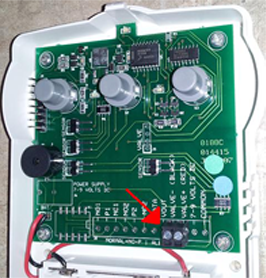
Check and make sure the battery ends are touching the metals plates within the control panel as illustrated (Duracell batteries will usually be affected).
Check the sensor connections in the Aquagate control panel.
Check the control valve connections in the Aquagate control panel.

Locate your Aquagate control panel.
Press and release the close button on the control panel. Water, should now stop flowing to your home. If your Aquagate control valve does not close after pushing and releasing the close button on the control panel, you may need to do it manually.

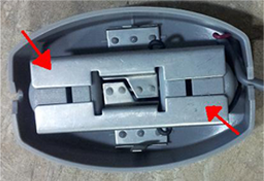
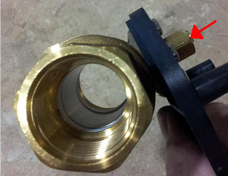
The first step will be to locate the Aquagate control valve. It will be located on your main water pipe. A grey wire will be attached running to the Aquagate control panel. From here, remove the three screws on the motor housing as illustrated by the arrows.
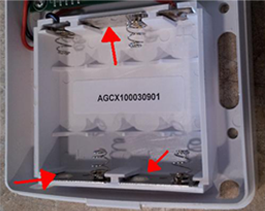
After removing the screws, remove the motor housing and you will see a brass square knob.
Rotate the knob with a pair of channel locks or crescent wrench one quarter (1/4) turn, in any direction, to close the valve. Water will now stop flowing to your home. Call Intermountain Soft Water for service.
Locate your Aquagate control panel.
Press and release the open button on the control panel. Water, should now start flowing to your home. If your Aquagate control valve does not open after pushing and releasing the open button on the control panel, you may need to do it manually.
The first step will be to locate the Aquagate control valve. It will be located on your main water pipe. A grey wire will be attached running to the Aquagate control panel. From here, remove the three screws on the motor housing as illustrated by the arrows.
After removing the screws, remove the motor housing and you will see a brass square knob.
Rotate the knob with a pair of channel locks or crescent wrench one quarter (1/4) turn, in any direction, to open the valve. Water will now start flowing to your home. Call Intermountain Soft Water for service.